Posts

Showing posts with the label linux

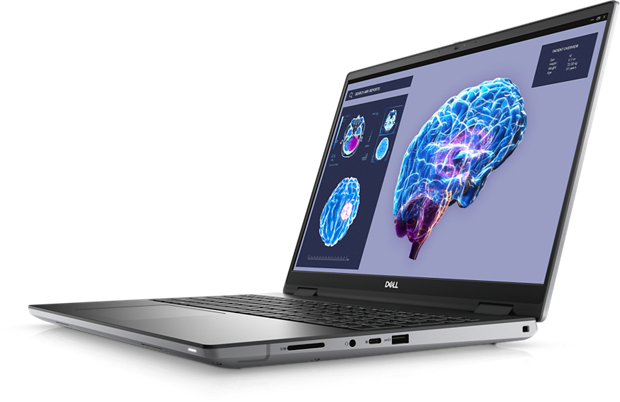
New Dell Precision 7680
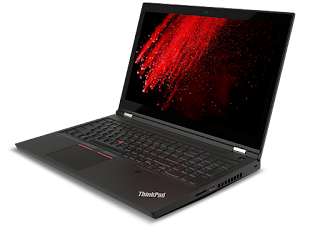
Dell 7680Well here we are again, 3-and-a-bit years later and I'm writing another "new laptop" blog post.  I've done this for the past many laptops I've been issued at work.  When examined over time, they make an interesting history to the progression of machines in general.  But for me they're always in the context of work.  My previous machines:

What's particularly interesting about this machine is that it's the first departure I've had from either an IBM or Lenovo branded Thinkpad.  Even before I started writing this series when my trusty old T61p turned up, I had Thinkpad machines.  It's onto a Dell this time around so I'll be interested to see how it holds up in comparison from the many points of view such as physical (looks and robustness), performance and of course Linux compatibility.  But first, as always, let's take a look at the specifications:
  • Intel(R) Core(TM) i7-13850HX CPU @ 2.10GHz (4608 bogomips in Linux)
  • 64GB RAM
  • Samsung 2TB NVMe SSD
  • 16" UHD+ 3840x2400 OLED, touch, 400 nits
  • Integrated Li-Po battery
  • Wi-Fi 6
  • NVidia RTX 4000 12GB
  • Front Facing Web IR Camera, HDMI Out, Headphone, 2x USB3.2, 3x USB-C3.2 Gen 2, GBit Ethernet, Fingerprint Reader, SD card reader

These are some pretty top level specs.  Sure, you can go higher on a few bits and pieces but as the specs stack up, this is clearly the most powerful machine I've had to date.  The doubling of RAM should be very helpful as well as the increase from 4GB (old laptop) to 12GB (this laptop) in GPU RAM should also help a lot.  I don't imagine I'm likely to be able to run especially big LLMs on this machine but with the extra GPU RAM I should have more space for screen recordings while still running other apps that rely on GPU such as Firefox or vscode.  The 28 concurrent thread capability over 20 cores should give more parallel processing capability but the processor operates at a lower clock frequency by default than my previous machine which I assume leads to the lower bogomips figure.  That said, the turbo frequency of this processor looks to be pretty decent at 3.8GHz and maxing out at a whopping 5.3GHz.  Hopefully, the lower clock speed will help with battery life as well.

In terms of the looks of the machine, I would say it's an improvement over the Thinkpad series.  But then that's not especially hard as Thinkpads, even to this day, are large bulky monsters that are very blocky to look at but rock solid for robustness and usability.  The new Dell machine is also a bulky monster by any standards, it's just not quite as bulky and monstrous!  It has a very pretty looking OLED screen which is highly glossy like a lot of Mac machines.  This looks wonderful on the surface but it does offer a vastly increased amount of screen reflection which is fantastic if you want to blank the screen to do your hair by using the gloss as a mirror, but not-so-good if you actually want to see what's on screen.  I lament the lack of buttons and the Thinkpad's tracking "nipple" on the Dell but I'm slowly getting used to the gestures on the trackpad i.e. two finger touch for right-click and three finger touch for middle-click.  So overall, it offers an improved look to the machine, it's smaller and lighter with a screen that reaches the edge instead of having a huge bezel.  However, I wonder if because of that whether it will last as long, I don't like the track pad as much and the keys on the keyboard are a bit smaller.  There are also some stupid choices about keys on the keyboard.  For example, they have the standard function lock idea for overloading the F-Keys with useful things like volume up/down.  However, there's a dedicated "calculator" button and a few other weird choices that mean there isn't room for dedicated page up/down buttons or dedicated home/end buttons which I find extremely annoying.

Hardware compatibility with Linux is going to be hard to beat for the Dell when compared to a Lenovo machine.  Lenovo certify their machines for Linux, they offer components that can be updated using open access to firmware.  So aside from the usual issues you have with proprietary nonsense with NVidia, the Lenovo machines are very strong on compatibility.  The Dell, as expected, isn't quite there.  We have the same NVidia nonsense as always, but that's not going away any time soon on any machine.  But when examining the firmware, there's a much smaller selection that can be easily updated through Linux.  Then we move to the Camera which, fortunately on my machine, actually works.  However, there's a ton of (particularly MIPI) cameras on Dell machines that have caused Linux users a real headache.  The interesting technical challenge I've had with this machine is the fingerprint reader.  I found the fingerprint reader on the Lenovo P15 worked out-of-the-box.  However, while it worked it wasn't especially good as the recognition on my fingerprint seemed to go down over time (about a couple of weeks) to the extend that it became unusable and I would need to re-register my print(s).  That disadvantage outweighed the advantages so I stopped using if pretty quickly.  The Dell has a Broadcom BCM58200 sensor (USB ID 0a5c:5843 for reference) which does not work out-of-the-box.  Well not on Fedora anyway!  I found some firmware for it on Ubuntu and have managed to get it working on Fedora by compiling up and installing my own RPMs - that's a story for another blog post.

It's going to be a really interesting journey as I migrate from Lenovo (on which I type at the moment) to the Dell (which is currently copying files from this machine).  I wonder which machine I'll prefer in a few weeks, a month and ultimately a few years time when the next laptop arrives - whatever that may be! 

Managing NVidia on Fedora

Linus Torvalds has previously had some very choice words to say about NVidia with regards their interaction with open source and Linux.  I've spent much of my career using (and battling with) the NVidia drivers on my Linux laptop and these are my notes that make life a little easier and better.  For me, NVidia drivers at home on a PC work pretty well.  They work less well on a laptop where things are a bit more complicated with external screens, hot plugging of screens, suspend, etc.  I've tried the open source alternatives and they really just don't work as well in terms of stability (not that I find the NVidia proprietary Linux drivers especially stable, especially on a modern desktop under Wayland) but also in terms of power management and graphical performance.  Hence, I've always concluded I'm better off running the proprietary drivers.  If it weren't for the fact that the Lenovo Laptops I use at work have their external monitor connections hard wired to the NVidia card then I would probably just turn off the GPU entirely and rely on the embedded Intel GPU.

Installation

Thankfully, this is pretty simple on Fedora due to the packaging at RPM Fusion.   Hence, I think the best way to install the NVidia driver on Fedora is to use the RPM Fusion repository, as follows:

  1. Follow the guide at https://rpmfusion.org/Configuration to install both the free and non-free RPM Fusion repositories
  2. Install the NVidia drivers (see https://rpmfusion.org/Howto/NVIDIA)

It is also best to set your GPU to "discrete only" mode in your UEFI/BIOS.

Note: there is a highly viable alternative repository that also I've run very successfully at Negativo17 and you can, of course, grab the drivers directly from NVidia via their unix downloads page.

Re-Build the NVidia Kernel Module

There are instances where manually kicking off the re-building of the NVidia kernel module can be useful. This can be done very easily as follows:

$ akmodsbuild --kernels $(uname -r) /usr/src/akmods/nvidia-kmod.latest 
$ sudo dnf reinstall <name-of-the-output-rpm-from-above>

Note that the above will rebuild the NVidia kernel module for the current running kernel. You can swap out the $(uname -r) piece of the command for the version string of any of your installed kernel modules to build for a different kernel that you have.

Suspend/Resume Stability

Create a file /etc/modprobe.d/nvidia.conf with the following content:

options nvidia NVreg_PreserveVideoMemoryAllocations=1
options nvidia NVreg_TemporaryFilePath=/var/tmp
options nvidia_drm modeset=1

These should already be on your system after installation but just in case, make sure you have the following RPMs installed by running:

$ sudo dnf install xorg-x11-drv-nvidia-power nvidia-modprobe

Ensure the nvidia suspend/resume services are enabled:

$ sudo systemctl enable nvidia-suspend.service nvidia-hibernate.service nvidia-resume.service

Note: do not enable the nvidia-persistenced.service as this can cause issues on a single GPU machine such as a laptop

Fixing graphical LUKS password prompt

Often, the installation of the NVidia driver can cause the LUKS password prompt to drop back to text mode. This isn't a problem from a functional point of view but it's not so nice to look at as the graphical prompt. If you want to restore the graphical prompt you need to ensure that the NVidia driver is built into your ram disk image. This can be achieved fairly simply, as follows:

Create a file /etc/dracut.conf.d/nvidia.conf and add these lines (note the spaces are required in the quoted strings so that's not a mistake):

add_drivers+=" nvidia nvidia_modeset nvidia_uvm nvidia_drm "
install_items+=" /etc/modprobe.d/nvidia.conf "

With that file in place, you can re-generate your ram disk image by running:

$ sudo dracut -f
Larger console font

Not strictly an NVidia related thing but while I'm on the topic of displays, on HiDPI/4k laptop screens, the console font (seen during the boot process if things go wrong) can be nearly impossible to read as it's far too small. You can resolve this issue by switching your console font to a larger font size.

First, make sure you have the relevant console font(s) installed:

$ sudo dnf install kbd-misc

Next, edit the file /etc/vconsole.conf and change the "FONT=" line to a larger font e.g.

FONT="latarcyrheb-sun32"


Gnome Extensions

With the current release of Fedora Linux being updated to version 40 this week, I find myself upgrading to it on the first day of release (rare for me, I usually wait a couple of months) and getting up-to-speed with the changes in Gnome 46.  My previous post about Gnome focused on my migration to Gnome 3 and the extensions I was using at the time.  During the course of the previous (nearly) 5 years, these have changed quite significantly as the Gnome desktop has grown and as my usage of it has moved on.  Hence, rather than update my old post as I have done in previous years, I thought it time to write a whole new post focusing on how I set up my Gnome desktop today.

So without further ado, this is the list of extensions I'm using right now as I write this post (in alphabetical order):

AppIndicator and KStatusNotifierItem Support

This is one of the few extensions that has stood the test of time with my particular usage of Gnome.  While the free desktop standard continues to specify the classic "icon tray" that was supported by extensions such as TopIcons, in reality few of the modern desktops (I'm referring to Gnome and KDE) support them.  The modern take on the tray icon is an AppIndicator icon and many modern applications are written to use this standard (and perhaps fall back to a tray icon). 

Dash to Panel

This is a more recent discovery for me.  I've previously evaluated Dash to Dock several times and never liked the user experience.  However, the similarly named and with somewhat similar functionality, Dash to Dock has replaced my use of the Window List extension.  It provides a more modern alternative to showing which windows I have open with window previews and suchlike.  It can do considerably more than the way I've configured it, but I have it set just how I like to work with my Gnome top bar still in tact and a minimal bottom bar used for navigating between my open applications.  If you want to try it out with my configuration, I've exported my settings into this GitHub Gist that you can import.

Frippery Panel Favourites

It takes your favourited applications and adds them as a set of icons to the Gnome top panel, making for extra quick access to your commonly used apps.  I tend to flip between using this and just searching for apps via the Super button (windows key).

GTile
This great little extension allows you to easily resize your windows in order to tile them across your display.  I love the side-snapping in Gnome 3 that allows you to size a window to half the screen size.  However, GTile adds an icon to your Gnome Panel that, when clicked, allows you to size to any area of your screen across a pre-defined grid - you can even change the grid size.  Brilliant for usability with lots of on-screen windows at the same time.  It strikes a great balance for me as someone that generally prefers to tile windows but doesn't like a tiling window manager.

Hide Activities Button

This is almost a little bit superfluous for my usage but I found myself never using the activities button (top left) in the Gnome Panel.  The Dash to Panel configuration I have created maintains an activities button (bottom right) which is the place I've grown familiar with in order to use my GUI to switch between desktops (although I generally switch between desktops using keyboard shortcuts).

Pano Clipboard Manager

This is a really great modern take on the clipboard.  Press shift+windows+v and you get a pop up at the bottom of the screen with a graphical representation of your clipboard history.  The extension is clever enough to be aware of various types of clipboard content such as text, images or hyperlinks.  You also get a button on the top panel that allows access to the clipboard, incogneto mode (stops copying stuff to the extension) and settings.

System Monitor Next

Adds little graphs to the Gnome Panel that show resource usage.  The extension is pretty configurable but I have it showing CPU, memory and network utilisation.  This allows me to keep an easy eye on my machine and how loaded it is at the current time.  Extremely useful for spotting those occasional rogue apps that start eating an entire core of my CPU.

New Thinkpad P15


This post continues a long running tradition and series of posts when I'm issued a new laptop at work.  I generally get quite a powerful and interesting machine as I'm a member of the IBM Hursley development laboratory and thus am issued a fairly beefy specification for a majority of desktop use rather than being a more mobile laptop.  I'm issued a new machine approximately every four years so my previous posts are about my:

It's interesting to see how the specification of machine has changed over time.  With the slowing (or disappearance) of Moore's Law, the speed advantage of more recent machines has come from other innovations (such as an SSD and an increased number of cores) rather than raw clock speed.  The highlight specifications for the P15 Gen 1 I have are...

  • Intel(R) Core(TM) i7-10750H CPU @ 2.60GHz (5199.98 bogomips in Linux)
  • 32GB DDR4 2933MHz
  • Toshiba 512GB SSD XG6 M.2 2280
  • 15.6" 3840 x 2160 IPS (non touch)
  • Integrated Li-Po 94Wh battery
  • Wi-Fi 6
  • NVidia Quadro T1000M 4GB
  • Front Facing Web Cam, HDMI Out, Headphone, 2x USB3.2, 2x USB-C3.2 Gen 2, GBit Ethernet, Fingerprint Reader, SD card reader

There we have it, the top level specs aren't all that different to the 4 year old P50 machine I had previously.  In fact the CPU speeds have dropped slightly although the P15 does have 12 cores to the P50's 8. RAM and GPU memory have both stayed the same and I still have a 512GB SSD.  Interestingly, the battery is now integrated which has moved away from the long standing removable battery on these top line Thinkpad machines.  There's a huge increase in the screen resolution and I dare say the screen would also have been improved in areas such as peak brightness (600 nits for the P15) and support for Dolby Vision HDR (there's also support for Dolby Atmos sound which will be a bit lost on me for a business machine).  While sounding good, if you put a 4k resolution onto a 15" laptop screen you pretty much need a magnifying glass to see anything so it's more or less useless unless you're consuming 4k video content.  No wonder then that the Gnome desktop defaulted to running in 4k mode but at 200% scale (which I think takes it back down to HD size unless I'm mistaken).

The day-to-day running of the new machine has been pretty good.  Not noticeably different to that of the old machine. This goes to show the lack of improvement in specifications of these new machines in general.  It's something I've noticed with my ageing home machine as well (which is nearly 10 years old) where the processor benchmarks are very similar to today's processors on a core-for-core comparison and I still have things like a decent PCI 3 bus.  It's always nice to have a bit of a refresh though and the thing I'm liking most about the new machine is the addition of the built-in fingerprint reader.  This particular piece of hardware is now fully supported on Linux and very easy to configure using the Gnome settings tool.  It makes logging in with a massive password much less painful.  I hope more apps (such as 1password) will eventually find ways of integrating biometric security on Linux as well.  It's worth noting that this functionality hasn't come at all by accident and has been a lot of hard work and a long road between both Red Hat and Lenovo to ensure that all new Lenovo laptop machines are fully certified to have a hardware configuration that contains drivers and firmware compatible with Linux.

There are, of course, teething troubles with the new machine.  These are mostly related to graphical issues and NVidia.  More recently, I'd taken for granted my old machine just working in these respects.  My old machine had similar teething issues when it was new of course and these were gradually ironed out with driver updates as time progressed.  So right now it's weird to be back in the dark days of having to use the NVidia settings panel to configure the screen resolutions I want as for some reason the binary driver is only showing up the full 4k resolution to xrandr under Linux (yes I'm still using Xorg, not Wayland, yet).  It's also a bit fragile in terms of going into sleep mode and resuming from sleep, it all works but there can be graphical glitches (sometimes and sometimes not) which I may need to restart the gnome shell to cure (Alt+F2 then type r and hit Enter).  While this is frustrating for now, I'm fully expecting driver updates to catch up and this machine will gradually settle down into the same level of graphical performance I was used to on my old machine i.e. no problems at all and no need to open up NVidia settings.  Perhaps the thing that surprises me most about all this though is the very fact that all of this has regressed.  I'm no expert in the graphical stack on Linux but it's rather unfortunate that I seem to experience the same pains and teething problems upon the issue of every new laptop.  It'll all get there.  One day!

Yet Another New Home Server

This year has seen me doing more in the way of little tech projects at home than I have done for a while, perhaps due to covid lock downs so if that's the case then I'll take this small positive from an otherwise rubbish situation.  Typically for me, these projects have focused around open source projects and some IoT.  More on those in some separate blog posts when I get around to writing them up.  But for now, I wanted to make some notes on my new home server set up.

I've had an array of different low powered home servers of the years that I've previously written about, namely the NSLU2, TinyTuxBox, Joggler and for the past many years a simple ReadyNAS box that I specifically bought for the Intel processor as it made compiling different bits and pieces a whole lot easier back in the day.  However, I have recently relegated the ReadyNAS box from home serving duties, keeping it only for its native NAS services because using it for other things has become increasingly difficult without updating the entire base OS (which is possible by I'm reluctant to do) due to down level software libraries like an ancient version of openssl.

In with the new then and I moved away from Intel architecture as it's now so much easier to compile for Arm chips and went with the, wait for it, drum roll, rather obvious choice of a Raspberry Pi 4.  Specifically, a Pi 4 Model B, 4GB.  I've paired it with the official Pi case power supply, micro HDMI cable and shoved in an A2  SanDisk Extreme 64GB SDXC card.

And so to the notes, my initial target for this new box would be as follows:

The Lounge

IRC might be a bit old hat but tons of open source project still use it for their more synchronous communications.  ZNC is the choice of old for staying connected to your IRC channels.  For those not familiar, it acts as a relay to the IRC servers you want to connect to.  Effectively, it connects as your IRC client to the servers and presents your local IRC client with an endpoint through which you can connect.  This allows you never to miss any messages and see the IRC conversation even when you're not actually online.  Matrix seems to be taking some of the old IRC community's attention with various projects setting up bridges between Matrix and IRC.  However, the relative newcomer project called The Lounge shows just how far web technologies and web sockets have come.  It's a darned site (pun intended) easier to install configure and use than ZNC so I'm a massive convert and big fan of the project.

The project is relatively stable in the master branch and doesn't release particularly often so I've open for the run from source approach to take advantage of all the latest development.  Other than that, I've only made 3 changes to the default configuration prior to starting up my The Lounge server:
  1. host: "127.0.0.1"
  2. reverseProxy: true
  3. theme: "morning"
As you can see, these are all pretty simple and somewhat trivial changes.  The host setting binds the listener to the localhost interface, thus making it suitable for use with a reverse proxy and not exposing the service outside of the Pi 4.  The reverseProxy setting tells the server it's expecting to run behind a reverse proxy (the clue is in the name I guess).  Finally, I've switched to using a dark mode theme rather than the default light mode.  That's it, the remainder of the configuration is all about which IRC servers and channels to connect to along with the usual IRC bits of registering your nick and logging into the nick server.

Mosquitto

This is even simpler to get going than The Lounge due to the fact it's bundled with Raspbian so you can just apt-get install it.  I've created a configuration based on the bundled example config file but changing:
  1. pid_file (probably just because I'm old fashioned like that)
  2. user (to drop privileges)
  3. listener (to specify a port number)
  4. certfile and keyfile (for SSL)
  5. log_dest (create a specific log file for the broker)
  6. clientid_prefixes (a bit of added security to only allow certain client IDs to connect to the broker)
  7. allow_anonymous (quite an important one!)
  8. password_file (so that connections are authenticated)
Hopefully, that gives me something secure as well as providing me with the broker functionality that I need.

Node Red

Again, simple to install as it's bundled with Raspbian.  It does like to run under the default "pi" user though, which is a bit of a shame security wise.  All I've done to the configuration is ensure it's listening only on the local interface and enable the adminAuth section such that I'm required to enter a user name and password to access the user interface.

NGINX
 
Another simple install due to using the bundled version that comes with Raspbian.  However, this time around there's a lot more configuration to do since I'm using it to front a reverse proxy onto The Lounge and Node Red.  This gives me a few advantages such as being able to restart NGINX in order to load new SSL certificates without interrupting the underlying services i.e. something like IRC can stay connected even though new certs are loaded.  Both The Lounge and Node Red support SSL in their configuration so this also means I only need to configure certificates in one place and have a single route through which I can access all my home services.  The idea and bulk of the configuration for doing this comes directly from one of the guides available for The Lounge.

server {
    # redirect HTTP traffic to HTTPS
    listen 80 default_server;
    listen [::]:80 default_server;
    server_name _;
    return 301 https://$host$request_uri;
}

server {
    # SSL configuration
    #
    listen 443 ssl default_server;
    listen [::]:443 ssl default_server;
    ssl_certificate /path/to/your/server.crt;
    ssl_certificate_key /path/to/your/server.key;

    server_name your.server.name.com;
 
    # Add this if you want to do web serving as well
    root /var/www/html;
    index index.html index.htm;
 
    location / {
        # First attempt to serve request as file, then
        # as directory, then fall back to displaying a 404.
        try_files $uri $uri/ =404;
    }
 
    # Configure reverse proxy for The Lounge
    location ^~ /YOUR_PREFERRED_IRC_URL_GOES_HERE/ {
        proxy_pass http://127.0.0.1:9000/;
        proxy_http_version 1.1;
        proxy_set_header Connection "upgrade";
        proxy_set_header Upgrade $http_upgrade;
        proxy_set_header X-Forwarded-For $remote_addr;
        proxy_set_header X-Forwarded-Proto $scheme;

        # by default nginx times out connections in one minute
        proxy_read_timeout 1d;
    }

    # Configure reverse proxy for Node Red
    location ^~ /YOUR_PREFERRED_NODERED_URL_GOES_HERE/ {
        proxy_pass http://127.0.0.1:1880/;
        proxy_http_version 1.1;
        proxy_set_header Connection "upgrade";
        proxy_set_header Upgrade $http_upgrade;
        proxy_set_header X-Forwarded-For $remote_addr;
        proxy_set_header X-Forwarded-Proto $scheme;

        # by default nginx times out connections in one minute
        proxy_read_timeout 1d;
    }
}
 
Let's Encrypt
From Wikipedia: "Let's Encrypt is a non-profit certificate authority run by Internet Security Research Group that provides X.509 certificates for Transport Layer Security encryption at no charge."

The model for using letsencrypt is pretty simple.  They sign your SSL certificates, free of charge, but their signing expires within 90 days.  Hence, they're encouraging a high turnover of certificates by regular renewals.  This means that realistically you need to automate the process of certificate signing.  To do this I'm using the getssl script which makes life extremely easy when coupled with a cron job to kick off the script on a regular basis.  I'm running it every day and the script decides whether to replace my existing certificates.  It all sits there quite nicely running in the background and doesn't get in the way at all, restarting NGINX only when a new certificate is put in place.  Due to the fact that NGINX is decoupled from the services it is proxying the other services aren't interrupted.

Open Sourcing a NetworkManager VPN Plugin

It's not every day I find myself publishing a new project to open source and even less so when that requires release approval at work.  I hope, over the years, I've written some useful bits and pieces and this time around I was keen to publish my work on the Internet rather than internally within the company.  This requires following due process of course and seeking the relevant approval for the publication to take place.

Fortunately, in the right circumstances, IBM are very amenable to releasing code to open source.  I was convinced enough that a NetworkManager plugin to add to the existing list of VPN plugins would not conflict with the business that an open source approval would be fairly trivial.  Happily, I was correct, and going through the process wasn't too arduous with a few forms to fill in.  These were, of course, designed much more for bigger releases than I planned so vastly over-engineered for this particular release but at least due diligence was applied.

On to the project and the code.  It's not a world-changer but a small VPN plugin for NetworkManager to drive Cisco AnyConnect and made available as NetworkManager-anyconnect on GitHub.  So I now know more than I'd care to mention about the inner workings of NetworkManager VPN plugins.  They're not very well documented (hardly documented at all in fact) so they're quite hard work to produce by looking over existing code in available plugins.  I started off from the OpenVPN plugin which turned out to be a mistake as the code base is vastly bigger than that required for a plugin as simple as the one I wanted to write.  Were I to start again, I would recommend starting from the SSH VPN plugin instead as this is actually very nicely set out and doesn't include a lot of the shared bloat that comes with other plugins that are formally a part of NetworkManager.


Installing Tensorflow GPU on Fedora Linux

Following on from my previous notes on building Tensorflow for a GPU on Fedora, I find myself back at it again.  I recently upgraded my GPU at home and time has moved on too so this is my current set of notes for what I'm doing with Tensorflow on Fedora.  This method, however, differs from my previous notes in as much as I'm using the pre-built Tensorflow rather than building my own.  I've found that Tensorflow is so brittle during the build process it's much easier to work with pre-built binaries and set up my system to match their build.

In my previous blog post I benchmarked the CPU versus GPU using the Keras MNIST CNN example and so I thought it would be interesting to offer the same for this new install on my home machine.  The results are  :
  • 12 minutes and 14 seconds on my CPU
  • 1 minutes and 14 seconds on my GPU
That's just over 9.9 as fast on my GPU as my CPU!

Some info on my machine and config:
  • Custom Built Home PC
  • Intel Core i5-3570K CPU @ 3.40GHz (4 cores)
  • 16GB RAM
  • NVidia GeForce GTX 1660 (CUDA Compute Capability 7.5)
  • Fedora 30 Workstation running kernel 5.2.9-200.fc30.x86_64
Background Information for NVidia Drivers
Previously, I've always used the Negativo17 repository for all my NVidia driver and CUDA needs.  However, the software versions available there are too up-to-date to allow Tensorflow GPU to be installed in a way that works.  This repository provides CUDA 10.1 where as Tensorflow, currently at version 1.14, only supports CUDA 10.0.  So we must use another source for the NVidia software that provides back-level versions.  Fortunately, there is an official NVidia repository providing drivers and CUDA for Linux, so let's use that since it also works quite nicely with the RPM Fusion repositories as well.  Hence, this method relies purely on RPM Fusion and the official NVidia repository and does not require or use the Negativo17 repository (although it would be possible to do so).

Install Required NVidia Driver
The RPM Fusion NVidia instructions can be used here for more detail, but in brief simply install the display drivers:
  • dnf install xorg-x11-drv-nvidia akmod-nvidia xorg-x11-drv-nvidia-cuda
There are some other bits you might want from this repository as well such as:
    • dnf install vdpauinfo libva-vdpau-driver libva-utils nvidia-modprobe
    Wait for the driver to build and reboot to get things up and running.

    Install Required NVidia CUDA and Machine Learning Libraries
    This step relies on using the official nvidia repositories with a little more information available in the RPM Fusion CUDA instructions.

    First of all, add a new yum configuration file.  Copy the following to /etc/yum.repos.d/nvidia.repo:

    [nvidia-cuda]
    name=nvidia-cuda
    enabled=1
    gpgcheck=1
    gpgkey=http://developer.download.nvidia.com/compute/cuda/repos/fedora27/x86_64/7fa2af80.pub
    exclude=akmod-nvidia*,kmod-nvidia*,*nvidia*,nvidia-*,cuda-nvidia-kmod-common,dkms-nvidia,nvidia-libXNVCtrl

    [nvidia-machine-learning]

    name=nvidia-machine-learning
    baseurl=http://developer.download.nvidia.com/compute/machine-learning/repos/rhel7/x86_64/
    enabled=1
    gpgcheck=1
    gpgkey=http://developer.download.nvidia.com/compute/machine-learning/repos/rhel7/x86_64/7fa2af80.pub
    exclude=libcudnn7*.cuda10.1,libnccl*.cuda10.1


    Note that the configuration above deliberately targets the fedora27 repository from NVidia.  This is because it is the location at which we can find CUDA 10.0 compatible libraries rather than CUDA 10.1 libraries that will be found in later repositories.  So the configuration above is likely to need to change over time but essentially the message here is that we can match the version of CUDA required by targeting the appropriate repository from NVidia.  These libraries will be binary compatible with future versions of Fedora so this action should be safe to do for some time yet.


    With the following configuration in place we can now install CUDA 10.0 and the machine learning libraries required for Tensorflow GPU support and all of the libraries get installed in the correct places that Tensorflow expects.

    To install, run:
    • dnf install cuda libcudnn7 libnccl

    Install Tensorflow GPU
    The final piece of the puzzle is to install Tensorflow GPU which is now as easy as:
    • pip3 install tensorflow-gpu

    Migrating to Gnome 3

    I'm a massive laggard in the move to a Gnome 3 desktop.  Colleagues and friends have been using it for years and to be honest, I've never been comfortable using it.  But, that changed recently and I've actually grown to quite like the new desktop environment I find myself working in on a daily basis.  So I've made a full-blooded leap to a modern desktop.

    Way-back when I started using Linux as a serious desktop alternative to Windows (in about 2000-2001 ish) I was running Gnome.  I migrated away from that to KDE 3 and switched to Gnome 2 when KDE 4 was released as I didn't like the changes they had made and the new KDE 4 desktop was horribly buggy and unstable in my experience.  (Maybe there's something about brand new desktops and my not taking a liking to them?)  When Gnome released Gnome 3 I absolutely hated the user experience and used XFCE for a while before settling on the MATE desktop which I've been using for quite a few years now.

    Trying out Gnome 3 again recently and I was pleasantly surprised that the desktop has progressed significantly since those first few releases I couldn't get along with.  But it's the addition of extensions that are the final straw in my move as I've found with just the right mix I can craft a desktop that gives me a nice balance between the new world and the old, much more familiar, world.

    (final update 24th April 2024) Note: there is an updated list of the extensions I use in my newer Gnome Extensions blog post.

    So, the real purpose of this post is to share the extensions I've discovered.  I'll document these below in brief but would also be interested to find others that are useful:

    Applications Menu (updated 5th Feb 2021 - no longer in use, see below)
    This was right at the very top of my list of requirements for Gnome 3 usability.  It simply puts an old school applications menu in the top bar, a bit like your old fashioned Windows start menu or similar from other desktops.  I am, however, finding I use this very little now as the search hot-key in Gnome 3 does seem to be a quicker way of finding and starting programs.

    Frippery Bottom Panel
    This is another of my top requirements for Gnome 3 usability.  It gives you a panel at the bottom of the screen (D'uh) that allows you to switch easily between applications you have running.  It also has a small workspace switcher which is why I like the Frippery version of this type of extension versus some of the others that don't have a workspace switcher capability.

    Top Icons Plus (update 5th Feb 2021 - no longer in use, replaced with AppIndicator, see below)
    Either the Top Icons or the Top Icons Plus extension that I'm using here seem so ubiquitous for Gnome 3 users I wonder why on earth they're not a default option, aside from the fact the Gnome 3 developers do seem to retain their keen vision on what a modern desktop should look like and "old" system tray icons are not part of that outlook.  This extension, if you're not already using it, allows you to see system tray icons such as the ones used by Virt Manager or Slack, for example.

    GPaste (update 4th Nov 2021 - no longer in use, too difficult to configure and doesn't always work the way I expected, replaced with Clipboard Indicator, updated again 8th Mar 2023, replaced with Pano Clipboard Manager)
    A clipboard management system that has a nice integration with the Gnome 3 panel.  I was previously using apps like ClipIt or Parcelite that do pretty much the same job.

    Lock Screen (update 5th Feb 2021 - no longer in use, I wasn't using this as I just hit Win+L to lock)
    This adds a button to the gnome panel that, when clicked, locks your desktop.  This would be the same as pressing Win+L on the keyboard.  I was in the habit of using a graphical button on MATE so having this back in Gnome 3 gives me the experience I'm used to.

    No TopLeft Hot Corner (update 5th Feb 2021 - no longer in use, Gnome Tweaks as a toggle for "Activities Overview Hot Corner" from the Top Bar options.
    I find the Gnome 3 facility to show activities when you mouse to the top left corner really annoying and it detracts from my productivity when it happens automatically.  Fortunately, this extension disables that feature.  It does make it more awkward to reach activities with the mouse (I'd have to click the applications menu first then select "Activities Overview") but I more or less always use the Windows key anyway.

    Places Status Indicator (update 8th Mar 2023 - no longer in use, I wasn't using it so have stopped installing it)
    This adds the old Gnome 2 style places menu to the Gnome 3 panel.  I find I flip between using this menu to start navigating directories and just starting Gnome Files and going from there.  Any which way, having this menu back on my desktop just makes it feel a bit more familiar and comfortable.

    Remove Dropdown Arrows (update 5th Feb 2021 - no longer in use, Gnome seems to have gotten rid of most of these by default)
    The Gnome 3 panel insists on having an arrow indicator to show items that pull down a menu when clicked.  These menus seem obvious to me and the arrows look rubbish and take up space, so this extension gets rid of them completely.  Happy days.

    Suspend Button (update 5th Feb 2021 - no longer in use, Gnome now has a built-in suspend button)
    I run from a laptop most of the time and use the suspend feature every time I "shut down" my laptop.  Bizarrely, there's no graphical facility (that I can find) in Gnome to suspend my machine.  This extension adds a nice button to the status menu that immediately suspends my machine.  Perfect.

    System Monitor
    Adds little graphs to the Gnome panel that show resource usage.  The extension is pretty configurable but I have it showing CPU, memory and network utilisation.  This allows me to keep an easy eye on my machine and how loaded it is at the current time.  Extremely useful for spotting those occasional rogue apps that start eating an entire core of my CPU.

    Media Keys (update 5th Feb 2021 - no longer in use, Gnome has media controls built-in)
    I haven't decided how useful this one is going to be yet and it's currently turned off.  However, when listening to Music through services like Amazon Music from a web browser it's nice to be able to control the audio without having to revert back to the browser ever time.  This extension simply adds a few buttons to the Gnome panel to control your media.  Handy if you haven't got the physical buttons on your keyboard too.

    Do Not Disturb Button (update 5th Feb 2021 - no longer in use, Gnome has the button built-in)
    I generally leave this extension disabled but it's useful to have installed and running when presenting or screen sharing.  It saves any embarrassing situations of people being able to read your notifications while they're looking at your screen.  Basically, it simply stops notifications being displayed, they're still received so you can go read them later.


    Blog edited with more extensions added on 28th August 2019:
    Frippery Panel Favourites
    I'm not quite sure how I missed this from my original list as it's an extension I've been using more or less since day one in Gnome 3.  It takes your favourite menu and adds this as a set of icons to the top of the Gnome Panel.  Makes for extra quick access to your commonly used apps.

    Some more extensions have been brought to my attention since writing the list above.  I've tried out all of the ones mentioned to me but these additions (below) are the ones that seem to have stuck.

    Caffeine (update 5th Feb 2021 - no longer in use, using Gnome's built-in do not disturb button instead)
    This extension sits fairly well alongside the Do Not Disturb Button extension in my original list.  This one simply disables the screen saver and auto suspend.  Hence, in conjunction with Do Not Disturb, will make a good presentation or screen sharing environment.

    GTile
    This is a genius little extension that allows you to easily resize your windows in order to tile them across your display.  I love the side-snapping in Gnome 3 that allows you to size a window to half the screen size.  In my older desktops I also had corner snapping to size a window to a quarter of the screen, Gnome 3 doesn't have this by default.  However, GTile adds an icon to your Gnome Panel that, when clicked, allows you to size to any area of your screen across a pre-defined grid - you can even change the grid size.  Brilliant for usability with lots of on-screen windows at the same time.


    Blog edited to update the list of extensions I'm using on 5th February 2021:

    Applications Menu
    Just a note to say that after using Gnome 3 for quite some time now, I rarely (if ever) use the Applications Menu any longer.  I tend to start applications either by pressing the Gnome hot key (Windows Key by default) and type in the search box, or by clicking on one of the favourites in the panel via the "Panel Favourites" extension.

    While the free desktop standard continues to specify the classic "icon tray" that was supported by extensions such as TopIcons, in reality few of the modern desktops (I'm referring to Gnome and KDE) support them.  The modern take on the tray icon is an AppIndicator icon and many modern applications are written to use this standard (and perhaps fall back to a tray icon).

    Blog edited to update the list of extensions I'm using on 8th March 2023:
    It's interesting to see how much use of extensions has changed over time.  I'm using considerably fewer now than I was when I first started using Gnome 3.  I put this down to two things: (1) Gnome is better at operating the way user's expect by removing the need for extensions such as the Suspend Button in the list above; and (2) I've become more institutionalised to the way that Gnome works, I'm much more familiar with it and have grown to like much of the way it works.

    Building Tensorflow GPU on Fedora Linux

    <update on Sept 13th 2019>
    I have written another post on how to install (rather than build) Tensorflow GPU for Fedora that uses a different and much simpler method.  See Installing Tensorflow GPU on Fedora Linux.
    </update>

    First off, let's say that there are easy ways of configuring Tensorflow for GPU usage such as using one of the docker images.  However, I'm a bit old school for some things and having always done so I've recently got Tensorflow going on my machine using my GPU.  Tensorflow CPU support is quite easy to do and generally works quite nicely using the pip install method.  GPU support, I've always found, is quite a bit more difficult as there are a whole bunch of things that need to be at just the right level for everything to work i.e. it's quite brittle!

    What follows are my notes (it's in the name of the blog) for how to build Tensorflow from scratch to enable GPU support and I do this on Fedora Linux.  If you want to know why it's worth bothering going to this effort, I've tested the Keras MNIST CNN example as a bench mark.  It takes:
    • 11 minutes 7 seconds on my CPU
    • 2 minutes 55 seconds on my GPU
    That's just over 3.8 as fast on my GPU as per my CPU so for large jobs this will be huge!

    Some info on my machine and config:
    • Lenovo P50 Laptop
    • Intel Core i7-6820HQ CPU @ 2.70GHz (4 core with hyper threading)
    • 32GB RAM
    • Nvidia Quadro M1000M (CUDA compute capability 5.0)
    • Fedora 28 running kernel 4.18.18-200.fc28.x86_64
    Install Required Nvidia RPMs
    You need to get everything Nvidia and CUDA installed on your machine first.   I quite like the Negativo17 repository for Nvidia on Fedora Linux and so I use this but you could also go with RPM Fusion or even download everything directly from Nvidia.  For me, right now, I have this little lot installed:
    cuda-9.2.148.1-2.fc28.x86_64
    cuda-cli-tools-9.2.148.1-2.fc28.x86_64
    cuda-cublas-9.2.148.1-2.fc28.x86_64
    cuda-cublas-devel-9.2.148.1-2.fc28.x86_64
    cuda-cudart-9.2.148.1-2.fc28.x86_64
    cuda-cudart-devel-9.2.148.1-2.fc28.x86_64
    cuda-cudnn-7.2.1.38-1.fc28.x86_64
    cuda-cudnn-devel-7.2.1.38-1.fc28.x86_64
    cuda-cufft-9.2.148.1-2.fc28.x86_64
    cuda-cufft-devel-9.2.148.1-2.fc28.x86_64
    cuda-cupti-9.2.148.1-2.fc28.x86_64
    cuda-cupti-devel-9.2.148.1-2.fc28.x86_64
    cuda-curand-9.2.148.1-2.fc28.x86_64
    cuda-curand-devel-9.2.148.1-2.fc28.x86_64
    cuda-cusolver-9.2.148.1-2.fc28.x86_64
    cuda-cusolver-devel-9.2.148.1-2.fc28.x86_64
    cuda-cusparse-9.2.148.1-2.fc28.x86_64
    cuda-cusparse-devel-9.2.148.1-2.fc28.x86_64
    cuda-devel-9.2.148.1-2.fc28.x86_64
    cuda-docs-9.2.148.1-2.fc28.noarch
    cuda-gcc-7.3.0-1.fc28.x86_64
    cuda-gcc-c++-7.3.0-1.fc28.x86_64
    cuda-gcc-gfortran-7.3.0-1.fc28.x86_64
    cuda-libs-9.2.148.1-2.fc28.x86_64
    cuda-npp-9.2.148.1-2.fc28.x86_64
    cuda-npp-devel-9.2.148.1-2.fc28.x86_64
    cuda-nvgraph-9.2.148.1-2.fc28.x86_64
    cuda-nvgraph-devel-9.2.148.1-2.fc28.x86_64
    cuda-nvml-devel-9.2.148.1-2.fc28.x86_64
    cuda-nvrtc-9.2.148.1-2.fc28.x86_64
    cuda-nvrtc-devel-9.2.148.1-2.fc28.x86_64
    cuda-nvtx-9.2.148.1-2.fc28.x86_64
    cuda-nvtx-devel-9.2.148.1-2.fc28.x86_64
    nvidia-driver-cuda-libs-410.73-4.fc28.x86_64

    You might wonder about some of the above, particularly why you might need a back level version of GCC.  When Fedora 28 has a quite capable GCC version 8 why on earth would you want version 7?  The answer lies in my comment about things being difficult or brittle, it's quite simply that CUDA doesn't yet support GCC 8 so you do need a back level compiler for this

    Install NVidia NCCL
    This library isn't available through an RPM installation or the Negativo17 repository and so you must:
    • Go to the Nvidia NCCL home page 
    • Click the link to download NCCL (requires an Nvidia developer login account)
    • Agree to the Terms and Conditions
    • Download the NCCL zipped tar file that matches your CUDA version (9.2 for this blog post)

    At the time of writing the file required is nccl_2.3.7-1+cuda9.2_x86_64.txz

    I simply untar this file into /usr/local and create a symbolic link as follows:
    • cd /usr/local
    • sudo tar -xf /path/to/file/nccl_2.3.7-1+cuda9.2_x86_64.txz
    • sudo ln -s nccl_2.3.7-1+cuda9.2_x86_64.txz nccl


    Install the Bazel Build Tool
    You're going to need a build tool called Bazel which isn't directly available in the Fedora repositories (that I know of at least) but fortunately there's a version in a copr repository you can use as documented run the following commands:
    •  dnf copr enable vbatts/bazel
    •  dnf install bazel
    Get a Copy of Tensorflow Source
    For this it's just as easy to use git as it is anything else.  You can directly clone the 1.12 release of Tensorflow into a new directory by running:
    • git clone --single-branch -b r1.12 https://github.com/tensorflow/tensorflow tensorflow-r1.12
    • cd tensorflow-r1.12
    Simply replace r1.12 in the above commands if you want to use a different Tensorflow release.

    Run the Tensorflow Configure Script
    This step is actually quite simple but you'll need the answers to some questions to hand, simply run:
    • ./configure
    I accept all the default options with the exception of:
    • "location of python" set to /usr/bin/python3 since Fedora still uses Python 2.7 as the default version at /usr/bin/python
    • "build TensorFlow with CUDA support" set to Yes
    • "CUDA SDK version" set to 9.2 (this value should match the cuda version you have installed and at the time of writing 9.2 is the current version from the Negativo17 repository)
    • "location where CUDA 9.2 toolkit is installed" set to /usr
    • "cuDNN version" set to 7.2 (similar to the cuda version above, this value should match the cuda-cudnn package version and 7.2 is the current version from the Negativo17 repository)
    • "NCCL version" set to 2.3
    • "location where NCCL 2 library is installed" set to /usr/local/nccl
    • "Cuda compute capabilities you want to build with" set to 5.0 (but this value should match the CUDA compute capability of the GPU in the machine you're building for)
    • "which gcc" set to /usr/bin/cuda-gcc (to use the back level GCC version 7)


    Fix Bazel Config
    The above config command writes a file but the location isn't compatible with the latest version of Bazel.  Presumably this issue will be fixed at some point in the future, it's not an issue with Bazel 0.18 and below as far as I'm aware, but has just become an issue on 0.19.  Simply copy the config to the correct place:
    • cat tools/bazel.rc >> .tf_configure.bazelrc
    Build Tensorflow with GPU Support
    This took around an hour to complete on my machine:
    • bazel build --config=opt --config=cuda //tensorflow/tools/pip_package:build_pip_package
    • bazel-bin/tensorflow/tools/pip_package/build_pip_package /tmp/tensorflow_pkg
    The first step is the long one for the build, the second simply builds the python wheel file.

    Install Tensorflow with GPU Support
    You've got your wheel file so simply install and enjoy:
    • pip3 install tensorflow-1.12.0-cp36-cp36m-linux_x86_64.whl 
    Run Some Code
    The first time I attempted to run some code to test I got an error:
    • failed call to cuInit: CUDA_ERROR_UNKNOWN
    This can be solved by making sure you have the nvidia-modprobe package installed.  Alternatively, you can run the little script below the following explanation.

    This seems to be some sort of permissions issue and running the following simple script to output the GPUs available on my machine but as root seems to have fixed the above issue i.e. put the following into a script, run that script as root, then any time you want to run code as an unprivileged user the above issue is fixed and the code will work:
    from keras import backend as K
    K.tensorflow_backend._get_available_gpus()

    If the above works then you can try out the Keras MNIST CNN example code.

    New Thinkpad P50

    It's been a while, but true to our 4 year hardware refresh cycle, I've just received my latest laptop - a Lenovo P50.  I've been installing it with Fedora 25 since Friday and configuring and copying data over this weekend ready to swap laptops first thing this week.  I'm looking forward to trying out the new machine although I'm not quite sure why as the specs are barely different from the machine I was given 4 years ago.  It's certainly the best indication yet I've personally experienced of Moore's Law coming to a complete halt as well as many of the other specifications not improving a huge amount either.  The two most noticeable differences are likely to be the more powerful graphics chip and the inclusion of an SSD.  That said, there is twice as much RAM in this machine and I had upgraded my previous machine with an SSD as well so that particular upgrade isn't going to be noticeable for me at least.

    My previous machine was a W530 and the one I had before that was a T61p (with a T41p before that) and so I'm well used to this particular line of Thinkpad laptops.

    Here's the specifications of the machine I've got, as ever there are variants of the P50 so if you have one or are thinking of getting one the specifications could be a little different but will be broadly similar to this:

    • Intel(R) Core(TM) i7-6820HQ CPU @ 2.70GHz (5433.79 bogomips in Linux)
    • 32GB DDR4 2133MHz
    • Samsung MZNLN512 (PM871) 512GB SSD
    • 15.6" 1920 x 1080 IPS (non-touch)
    • 6 Cell Battery
    • Wireless A/C
    • NVIDIA Quadro M1000M 4 GB
    • Front Facing Web Cam, Mini Display Port, HDMI Out, Headphone, 4x USB3, Smart Card Reader, GBit Ethernet, Thunderbold, Fingerprint Reader
    So looking at those and comparing in more detail to what I had before it seems my gut feeling was pretty good.  The CPU benchmarks are more-or-less exactly the same and certainly within tolerances of error as well as other performance increases that will effect the benchmarks such as the memory clock speed.  Here's the comparison between the W530 CPU and the P50 CPU:


    The same can't be said of the GPU benchmarks though so it looks like GPUs are continuing to gain in power even when CPU speed increases have run out of steam:

    The other noticeable difference I hadn't spotted before is the battery size.  That's very apparent when you pick the machine up as it's actually a little bit thinner (probably also due to the lack of DVD/combo drive) as well as not as deep i.e. it doesn't have the big battery sticking out of the back that has been common place on this line of Thinkpad machines over the past decade or so.  I'm guessing (without having done any research on the matter) that this is probably due to improvements in battery technology so I'd think Lenovo have probably moved over to Li-ion or Li-po batteries.

    In terms of running and using the machine, it does seem very nice so far as one might expect.  It's running Fedora 25 very nicely and hasn't caused me any issues at all during setup.  I'm not really expecting any either as most if not all of the hardware seems pretty well support by Linux these days.  I think, in fact, Lenovo even offer to supply this machine pre-installed with Linux if you want.  That said, there looks to be one possible sticking point in terms of hardware support at the moment but this is very minor.  That is, the build-in fingerprint reader doesn't seem to have a driver available on Linux yet.  I did some very brief research into this yesterday and it's not clear why vendor support is lacking for the device at the moment although I did find at least one effort that has gone a fairly long way towards reverse engineering it and starting to write a driver so I would guess within the next year we'll see some sort of support for the fingerprint reader too.

    All in all then it's a good machine even though it's not a huge upgrade over my 4 year old laptop!

    Compiling the 8192eu driver for the Raspberry Pi

    I recently had the need to Wi-Fi enable a Raspberry Pi and so bought a D-Link DWA-131 Wireless USB Adapter.  I knew from something I'd read that it was a bit of a gamble in terms of whether it would be supported by the Pi under Raspian.  It turns out there are currently 3 revs of this adapter with different chipsets in each.  The one I got was the latest E1 version identified with the USB Device ID 2001:3319 that requires the realtek 8192eu driver.

    Here's how to get it working under the September 2015 Raspian Jessie running Kernel 4.1.7+ for which I found some similar instructions a helpful starter:

    1.  Get up to date and ready for compilation

    sudo apt-get update
    sudo apt-get upgrade
    sudo apt-get install build-essential git


    2. Grab the Driver Source

    git clone https://github.com/romcyncynatus/rtl8192eu.git

    or from

    http://support.dlink.com.au/download/download.aspx?product=DWA-131


    3. Patch the driver source for Kernel 4.x

    cd rtl8192eu
    Apply the following patch to rtw_android.c

    diff --git a/os_dep/linux/rtw_android.c b/os_dep/linux/rtw_android.c
    index 40ddf07..f7c496e 100755
    --- a/os_dep/linux/rtw_android.c
    +++ b/os_dep/linux/rtw_android.c
    @@ -342,7 +342,11 @@ int rtw_android_cmdstr_to_num(char *cmdstr)
     {
            int cmd_num;
            for(cmd_num=0 ; cmd_num<ANDROID_WIFI_CMD_MAX; cmd_num++)
    +#if (LINUX_VERSION_CODE >= KERNEL_VERSION(4,0,0))
    +               if(0 == strncasecmp(cmdstr , android_wifi_cmd_str[cmd_num], strlen(android_wifi_cmd_str[cmd_num])) )
    +#else
                    if(0 == strnicmp(cmdstr , android_wifi_cmd_str[cmd_num], strlen(android_wifi_cmd_str[cmd_num])) )
    +#endif
                            break;

            return cmd_num;


    4. Grab the rpi-source tool (to download the Pi kernel source)

    wget https://raw.githubusercontent.com/notro/rpi-source/master/rpi-source 
    chmod +x rpi-source
    sudo mv rpi-source   /usr/bin/
    sudo rpi-source -q --tag-update


    5. Install the Pi kernel

    sudo rpi-source --skip-gcc


    6. Build and install the driver

    make ARCH=arm
    sudo make ARCH=arm install
    sudo bash -c 'echo "options 8192eu rtw_power_mgnt=0 rtw_enusbss=0" > /etc/modprobe.d/8192eu.conf'
    modprobe 8192eu

    New Thinkpad W530

    It's been quite a while since I got my last laptop upgrade at work, coming up to 5 years in fact.  We have a 4 year refresh programme so I'm a little overdue but have just been given a shiny new Thinkpad W530 from Lenovo.  This seems to be our current standard issue machine for "developers" which is our way of saying "power users".  I'm part of the software development business and hence get one of these.  The up side of course is the latest and most powerful technology at a reasonably high specification, the downside is they're really quite big and heavy and the power brick - well it really is a brick.  I'll spare giving a full review of the laptop itself as there are plenty of them out there already and you'll know how to find them, however, there are one or two things I wanted to say about the machine and in particular regarding my preferred use of Linux rather than the software it comes pre-installed with.

    Here's the specification highlights of the machine I've got (there is a bit of variation available with the W530):

    • Intel(R) Core(TM) i7-3720QM CPU @ 2.60GHz (5187.87 bogomips in Linux)
    • 16GB DDR3 1600MHz
    • 500GB (7200rpm) HDD
    • 15.6" 1920x1080
    • 9 Cell Battery
    • Wireless N
    • NVidia Quadro K1000M
    • Front Facing Web Cam, Mini Display Port, VGA Out, Headphone, 2x USB3, 2xUSB2.0, Smart Card Reader, Firewire,DVD Burner, GBit Ethernet
    It came with firmware version 2.07 which was only 3 months old but had already been superseded by two newer versions when I got it earlier this week (there is a firmware readme available).  The newer versions fixed a couple of well known issues with screen corruption under Linux and the fan always running at full speed (and hence being noisy).  So I downloaded and applied the updated version before I did anything else.


    The next thing I did was tweak a few settings in the BIOS to my liking and install Fedora 18 with the KDE desktop.  The installation went very smoothly using the Integrated graphics card on the Ivy Bridge CPU.  The W530 has Optimus built in for efficient switching between the integrated card and discrete NVidia card for a great combo of power/performance, it is however, designed for Windows and Linux support hasn't quite caught up yet although there is an open source option available - which I'm yet to try.  Post installation I installed the latest NVidia drivers available from the RPM Fusion repository (304.64) ready to switch to using the graphics subsystem in discrete only mode.  The advantage of this is greater graphical processing power and also the ability to use external display devices.  The integrated graphics card is only able to drive the laptop screen and doesn't output via the VGA port or display port.  The down side to the NVidia card is a greater power draw so reduced battery life.  Also, at the time of writing the Nouveau driver doesn't support the Quadro K1000M card so you're forced into using the proprietary driver.  This situation can only improve over time and hopefully Optimus support will grow in Linux too but I'm not holding my breath on that one given NVidia's attempt to put support into the Linux kernel was refuted by the kernel developers last year due to it not being GPL code.

    Away from the graphics subsystem which was always going to be the most difficult thing under Linux on this machine, the rest of  it appears to be very well supported.  There are a few bits and pieces I haven't quite got around to trying in the couple of days since I got it but my impression is generally quite good.  Speed, as you would expect is very good although nowhere near my home machine which is a similar specification but contains an SSD instead of HDD.  Consequently, I put the speed boost I see at home down to this more or less entirely.

    I've also moved away from Gnome (I don't get on with Gnome 3) and gone back to using KDE once again which I had moved away from 5 years ago when I installed my previous laptop as KDE 4 was pretty shocking at the time as well.  I've used KDE a lot more than I have Gnome in terms of years of elapsed usage but I did get on very well with Gnome 2 for the past 5 years and I'm sure I'll miss it.  That said, I can't see myself ever moving to Gnome 3 unless the developers go back on their current manifesto of treating users like idiots.  It'll be interesting to see how the Mate desktop progresses and whether XFCE picks up as well given they both have benefited from Gnome 3's unfortunate design decisions and have a much smaller community of users and developers than either Gnome or KDE.

    In general then, I'm pleased with the new machine.  It's up and running to my liking in a very short period of time.  The graphics are bound to be a pain until I get used to relying on the nvidia-settings utility once again.  However, the other benefits it brings in terms of larger memory and greater processing power over my old machine are probably worth it.